Posts

Showing posts from 2015

Ties

Image
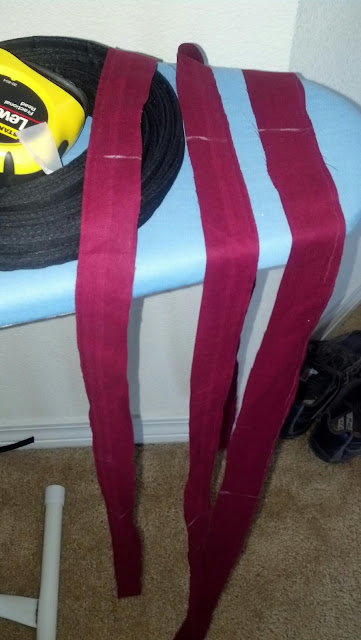
Ties are easy to make. In not positive they were period in SCA clothing, maybe in some but this is a requested and non A & S judged project. Grommets are a no no. But they are useful for the quicker fun projects as well. My friend wanted a Tudor dress which comes in several pieces. I even did a little research on the style she liked. This time I'm deciding to make ties for the sides of the bodice instead of closing sides and opening the back. Anyway for ties, all you have to do is use the same material from the main cloth your using. Cut long strips first with maybe a width of 1 inch. Go ahead and on one end tie a regular shoelace bow. This is your check to see how long will be needed. Undo and measure. Mine came out to 16 inches and will be cutting 5 of them at that many inches. On the bodice I went ahead also and measured out where they are going on all sides. Total of 10 on left and 10 on the right. That's 20 in total. White chalk all your measures and cut. Chalk your ...
Prices

Note: Prices will vary based on size, style and custom fitted. These are prices based on materials that are given to me to use for your project. If I buy all of the materials for you, please keep in mind prices are doubled and will take longer to do. SCA member  $5. Off on your total Clothing Chemise - 40 + Bodice - 35 + Elastic or Pull drawn skirt - 20 + Gathered skirt - 30 Pleated skirt - 35 Full long gown - 50 + Simple T Tunics - 25 + Elastic or pull drawn pants 25 + Special custom outfits vary in price. Weaving Prices Based on size and width and if your supplying materials. Inkle woven belt - 25 and up Tablet Belt - 35 and up. Please let me know if you have a deadline. I'm pregnant as well so things might be a little slow my apologies.

Layering and Blending

Image
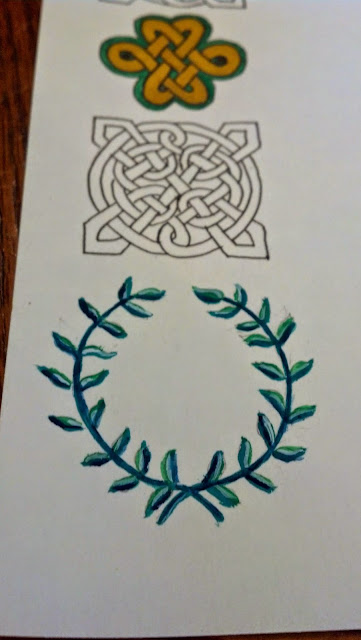
This is what I've learned over the years in art.  For layering colors, start with a base color.  Find another color slightly lighter of the same lineage for the 2nd. You'll add the 2nd color to your picture as highlights to make the picture pop better. You'll see in the Meridies greenery I used 2 main colors. Dark green and light green. Let it dry. Then you can go in with a much darker color. Instead of using a pen, I used a Prussian blue not black to darken up the stem and a little on the leaves. Let it dry again. This time add white with a tiny bristle brush or a tiny toothpick. You don't need much white. Too much will cause your picture too look awful. Watering the white down also helps. Add a bit of white on the surface of the object to make it look more realistic or pop even more. The good thing with knots you can paint over lines in certain sections to stay within the knot. If you want to give a knot more dimension instead of looking just flat matte, find a paint...